Gila monsters (Heloderma suspectum) are large stumpy lizards with bright handsome markings that are both cryptic and aposematic simultaneously, and whose hands look like neoprene wetsuit gloves with claws. They are remarkable for being one of only two venomous lizard species in the world. They live in the Sonoran and southern Great Basin Deserts and love to eat quail eggs, nestling birds and mammals, and other slow-moving prey items. (Below: captive gila monster on a wooden schoolhouse floor, photo A.Shock)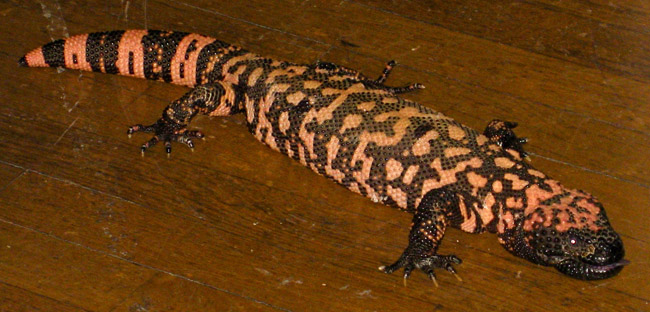
Approximately life-sized clay Gila Monster “bowls” are items I only make one or two of per year or so. They’re quite time-consuming, since they’re textured, slipped, and glazed pretty much beaded 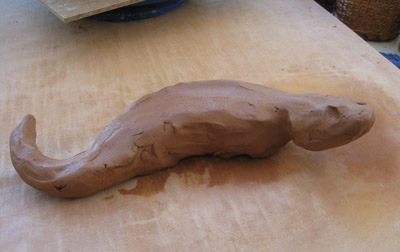 scale by beaded scale. Here’s one now :
1) I form a blob of clay that looks like a gila monster. This early stage is the time to get any sinuousness in the tail, neck and belly, so the clay “remembers” it. Then it’s time to put the wet lump aside to set up, or stiffen slightly, so that it can be shaped further. Sponges help hold a pose, if 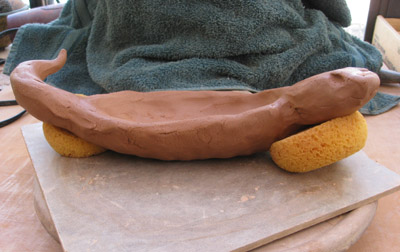 desired. >>
2) As the water leaves it, the clay becomes more self-supporting. While waiting for this to happen, I make legs — oddly spindly for such a stout body — with blocked out feet, to stiffen for adding later. I also hollow out two thick places in the monster body, to aid in drying: the head, and the base of 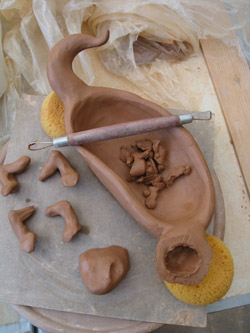 the tail. This also makes the completed piece lighter and better balanced. It is important to make a tiny, invisible passage into the hollow part from the outside, to let air escape during firing, or there could be an explosion. <<
3) With the clay slightly stiffer, I smooth the shape into its final form, including carving the toes from the blocked-out “hands”, and rounding the belly “bowl” part. This shape causes herp boys to giggle, because it makes the lizard look like roadkill to those with scavenging permits for heloderm pelts. From my point of view, it makes the piece functional, if desired: an Effigy Vessel, and not just a representation.
4) The next step is to attach the legs, and texture the skin. This must be done at a particular point of dryness, when the clay is still wet enough to accept the stamps I use to make the “nail-heads” in the skin (Heloderma 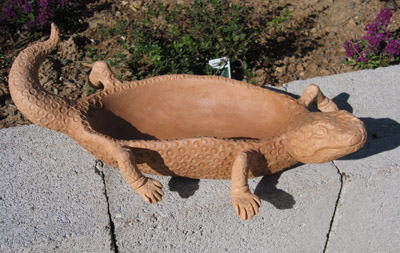 means “nail-skin”), but stiff enough to hold up to the handling and pressure of stamping it. Then it’s waiting for it to be bone-dry for slipping (right). >>
The belly-texture, which looks like pink-and-black Indian corn on the cob, is carved into the clay rather than stamped — this is particularly time-consuming, especially for a part that isn’t seen very frequently. Early on, I searched the web for a reference photo for Gi-Mo belly-scales, and never found one. Fortunately, I persuaded a handler at a wildlife education event to flip a live one up for photos (she held it vertically, not upside-down), and got this great shot, which tells me all I need 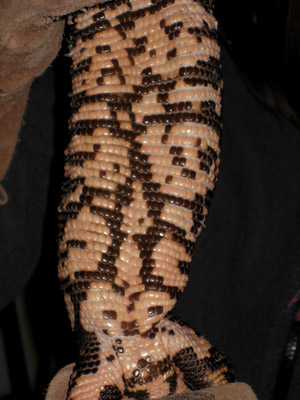 to know about what the unders of a monster look like, including vent details (<< left). You can just see the heavy-duty cowhide welding gloves the handler was wearing; they were covered with black half-moons: venom-marks from previous crabby bites. <<
5) Slipping an item bone dry is slightly risky, as adding water to a piece at this point can cause cracking. But adding slip to a dry surface gives a crisper, less texture-obscuring coating. I use a combo of commercial under-glazes and slips I make in the studio. It’s necessary at this point to choose the subspecies: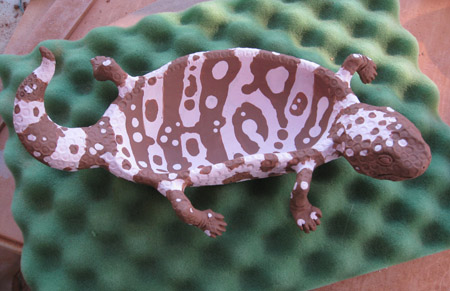 the banded H.s. cinctum from the northern part of its range, or H.s. suspectum from the southern part, which has a more complicated reticulated pattern. This one is kind of a combo. >>
6) After bisquing, I glaze the piece with dots (another labor and time-intensive step), each dot on the raised nail-head part of the texture, with a combination of black and pinkish-orange glazes. After it’s fired, this adds depth of color and a glint to the lizard’s skin, similar to the fresh skin of a newly-molted lizard. Sometimes, I add a leather tongue, if the monster’s mouth has been made slightly opened. I’m looking into making a fully-open mouth next time, with wire teeth, giving it a really venomous-looking gape. Here’s a shot of the finished version, a little more bulbous than an authentic lizard, but — after all, it’s a bowl: 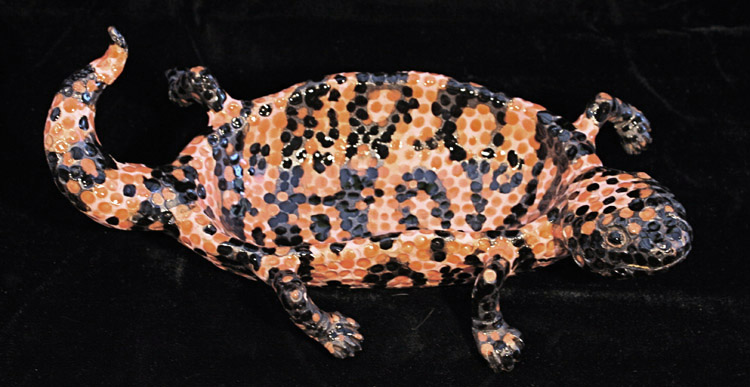
Etymology
As mentioned above, Heloderma means “nail-skin”, for the fact that the monster’s skin looks studded or beaded rather than scaled. suspectum, the species name, comes from the fact that early herpetologists were uncertain if the animal were venomous or not, and only suspected it was because of anecdotal accounts of its potentially lethal bite. Eventually it was confirmed by laboratory experiments, and dissection, which revealed the large venom glands in the lower jaw.
Check out more info about the natural history of these lizards here.
All photos A.Shock
