Our recent visit to Paris was shaped to some degree by the insistence of April on barging into May: cool temperatures and showers persisted for much of the trip. We were prepared, and rain is not a problem that sweaters, umbrellas, and sturdy footwear can’t handle —  except on the one morning we had determined to devote entirely to birding. That was pretty much a washout, since the rain was heavy and steady. Birding in significant rain offers specific challenges: wet, fogged eyeglass and optics lenses, using binox with one hand while juggling an umbrella in the other, soaked field-guide pages, and draggled birds whose plumage colors are impossible to determine, for instance.
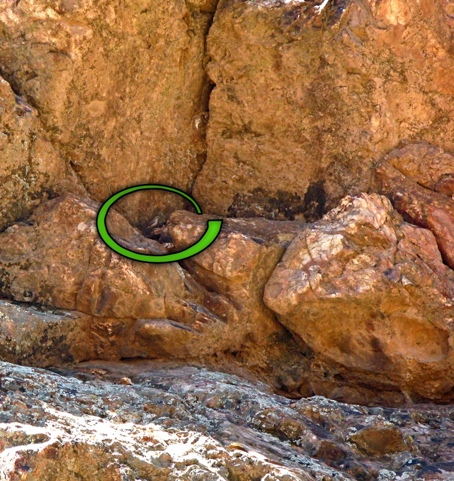
<< The pine plantation at the northern end of le Bois de Boulogne was recommended for conifer-loving species such as Firecrest; however, the rains had rinsed the pines clean of birds the morning we visited (photo E.Shock).
We stuck with it because frankly it was such an outré experience to have the huge Bois de Boulogne to ourselves, except for a dogwalker leading at least a dozen dogs, the occasional die-hard jogger, two working women still on the job well into daylight, and a very few very wet birds, including what must have been a female pheasant daintily treading around condom wrappers along an obscure side-trail we’d stumbled on. No sun = no bearings, and we walked in soggy circles until lunchtime, finally heading for the Porte Dauphine exit to search for a café (a goal that oddly matched the difficulty of finding birds in the park in the rain).
>> Sometimes you have to set aside these guides for Michelin’s Guide Vert, or the equivalent.
The weather made real birds a bit harder to come by than May sunshine would have done (see part 1 here, concerning real birds), but fortunately there are many birds to be found in a city as ancient and well-stocked with ornament as Paris. The unexpected female pheasant above provides a good starting point for our sightings of grouse-like and ground-loving birds who weren’t driven to shelter by a few raindrops.
It’s not always possible to positively ID species in artwork, but it’s clear the four sturdy birds shown below are intended to be Red-Legged Partridges (Alectoris rufa), Perdrix rouge en français. Prominently displayed in the Cluny Museum, the panel is stained glass, separated from its building, where it was probably once the lowest element of a church window in Normandy, dated to “around” 1500 CE.
I’ve read that the partridge is common in medieval Church iconography on account of certain aspects of its lifestyle, as asserted by early chroniclers of natural history. They believed that the female partridge steals eggs from other hens, and will incubate them with her own clutch. Little good it does her, the story goes, because upon hatching the purloined chicks recognize the voice of their real mother and run swiftly back to her, making partridge life-history an optimistic allegory for the Devil stealing souls who flock faithfully back to the Church. Odder still are the old beliefs that the mere passage of air from a male partridge’s wings onto a hen could cause her to be impregnated, and that male partridges forced vanquished rival males to submit to sex.  These morally slack tendencies, along with the oft-repeated etymology of the word Perdix from Greek perdesthai (πέρδεσθαι) “to break wind” referring to the birds’ clapping wing-noise, were enough to brand the species as impure by experts such as Isidore of Seville (<< left, perhaps relying on Pliny the Elder for his natural history), and are said to explain why partridges appear in religious art as emblems of reprobate behavior.
In an admittedly brief search through modern ornithological resources, I couldn’t find much evidence for any grouse habits that would give rise to these beliefs, except perhaps the fact that a Red-legged partridge female lays fairly large clutches — on average about a dozen eggs — which might look to some like the result of theft stemming from matronly covetousness; or that the wing-clapping, oddly vocalizing lek behavior of male grouse of many species (see Capercaillie link below) might account for the air-born insemination story. However, according to modern ornithologists, Red-legged partridge are among the most monogamous of the gallinaceous birds, and longer-term pair-bonding has been observed among these partridge pairs than in other notoriously promiscuous members of the grouse clan. You would think this gap between nature and natural history might limit the usefulness of the species as a bad example, except no doubt the clergy, through instructive sermons and eye-level stained glass panels, was able to ensure that their version reached the popular ear. Nevertheless, I suspect Partridges were of interest to the pragmatic people of the Gallic countryside less for their christian symbolism than for their tasty flesh.
People’s abiding enthusiasm for the succulent aspects of France’s fauna is made plain on this building, at 134 Rue Mouffetard in the 5th arrondissement (photo E.Shock, click to enlarge). >>
Rain may have caused us to set aside our bird guides, but not our binoculars — I carry my small ones on trips like this because they’re handy for getting good looks at architectural detail like frescoes, stained glass on high, and gargoyles. With them I could see more clearly the partridges and other game animals found perched on flourishes and vegetal motifs in the ornate painted façade on the residence above what is now a celebrated cheese shop. Originally the ground floor shop was a charcuterie-traiteur run by Facchetti, a butcher, who commissioned the frescoes in 1929 from the Italian artist Eldi Gueri. He depicted bucolic pastel scenes of country life between the windows of the first floor, while the upper floors bear elaborate brocade-like brown and white patterns in the “style of the Italian renaissance”.  They show game animals, including a pig, wild boar, deer, and a variety of birds, perhaps reflecting the varieties of saucissons and charcuteries Facchetti offered.
Among the birds are woodpeckers, pheasants, and grouse, including what must be a Capercaillie (upper bird to right >>) — a showy, giant, black grouse of Old World coniferous forests, depicted here with his tail fanned in courtship display, like his North American relative the Wild Turkey. Capercaillie (Tetrao urogallus), le grand tétras en français, although a seriously excellent bird (check out its absurd courtship display here), is not now — nor ever was — native to the Paris metro area, except for the two mirrored images dwelling here in tinted plaster as idealized icons of the tasty abundance of the woods. And the lower bird? — it has me stumped: perhaps a wood pigeon, with its longish tail and straight bill. It’s not unlikely: one wood pigeon would make several meaty pies. It appears to be paired with the bird below it (only partly visible in this edit) which is a dove, perhaps a turtle dove, to judge by the scaley pattern of its dorsal feathers.
 On the same façade, the balcony birds look like woodpeckers, especially the one on the right with its crested head. Are woodpeckers included here because they are a jaunty, spirited design presence, or does it mean they were considered fair game for the table? I haven’t been able to discover an answer to this, although ornithologists and conservationists have for decades been working to diminish the long-standing Continental tradition of song-bird consumption by humans. These painted images are the only woodpeckers we saw on the trip, except for one quick glimpse of a real pic vert — the Green woodpecker (Picus viridis) — the Eurasian equivalent of our Flicker except largely green. (Perhaps the green ones taste like mint?)
I remember from earlier travels in France that woodpeckers can be hard to find; they appear when they appear, or not — like woodpeckers anywhere. But unexpected sightings are one of the joys of birding, like this one: a two-foot tall street-art roadrunner. Popularly known in France as “Bip Bip” after the familiar Chuck Jones cartoon character, the roadrunner’s French common name is Géocoucou, a more accurate handle than the folksy English name “roadrunner”, since phylogenetically the bird is actually a ground-dwelling cuckoo.
We wondered why a street artist had wheat-pasted the photo-image of a southwestern bird to a wall under the half-timbered shelter of a medieval Parisian alley. No explanation was evident (to us) as to why it was posing among the sprayed graffiti. As with ecclesiastical stained glass partridges, a viewer would just have to know what it meant, or be told. But no St. Isidore of street art proposed to illuminate it for us. How odd that of all of the bird imagery we’d encountered, the most recent one was the one whose significance I least understood. Still, I was happy to have spotted this bird. It was as far from the desert as we were, yet it had found a home — even a temporary one, until the rain melted the soluble wheat-paste, or someone painted over it — in the heart of Paris.
(All photos A.Shock except where noted)
Etymological note: Choate, in his Dictionary of American Bird Names, primly avoids the earthy perdesthai etymology twice: first, in his entry for “Partridge”, by releasing nothing more airy than a fussy list of spelling variants in various European languages over time, and then again under the genus name “Perdix”, by reciting the tale of the youth of that name, Daedalus’ too-clever nephew, whom the craftsman nudged off a tower as unwanted competition. But the boy was saved by Minerva (according to Ovid), who turned him into a bird — in fact, a partridge — just before he hit the ground. Choate diminishes the force of this explanation by quoting MacCleod (of The Key to the Names of British Birds fame) who commented that the youth was more likely named after the bird than vice-versa, which seems to leave us inescapably with perdesthai, “to fart”, as the source for perdix, the Greek and Latin word for partridge, after all.