A few weeks ago, we discovered that one of our local Gambel’s quail pairs had nested in an aloe bed at the foot of the back garden wall.
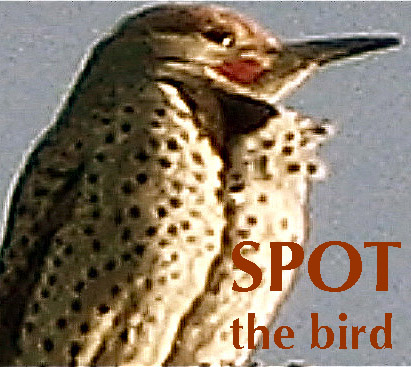
The pale, speckled eggs were tucked deep into a hollow among the spiky aloe leaves — real Spot the Bird material — they’re barely visible inside the red circle on the photo. (click to enlarge) >>
The hen had scraped a shallow depression, lined it with bits of dry vegetation and a few feathers, and settled hennily onto the eggs. She had hidden her nest well, but unfortunately it was while we were out of town and the garden was quiet. Once we came home and started watering and raking and making a human kind of tidying fuss, she flushed when we passed near. If she hadn’t flown out of cover each time with a clapping wing burst, we might never have discovered her and her trove. On the other hand, these skittish, explosive escapes were as much distraction as alarm, designed to draw a predator’s attention towards herself, and away from her helpless, immobile egg cache. But we kept away as much as possible and did the math, looking forward to seeing the little cloud of downy chicks swarming uncountably behind her before long.
For more than a week we avoided her part of the yard as much as possible in  order to keep from disturbing her, but occasionally we had to Pass the Nest. At those times, when she flew, or if she wasn’t at home, we’d peek briefly into her green hollow to see what was new. We counted ten eggs, which is about average for Gambel’s quails. If the clutch had been out in the open, it wouldn’t have looked significantly different from these Cadbury Mini Eggs (photo by William Warby from Wikimedia Commons) — if they’d been a bit rounder, larger, and not delicious candy-coated chocolate. No pink or yellow ones, either:
  they all look like the white ones with cinnamon speckles and blotches.
Here’s a slightly better view of the genuine eggs, enlarged from the photo above right >>
For a week nothing changed: hen, aloe, eggs. Late one afternoon I passed by, and when she didn’t flush I peered down into the hole. I didn’t see eggs — just some miscellaneous checkering and speckles. Since quail babies follow mom right out of the nest the minute the last chick has pipped, never to return, my first thought was that the chicks had hatched and I was seeing eggshells. But it didn’t look quite right for that. I bent closer in, peering, and saw bright eyes staring back.
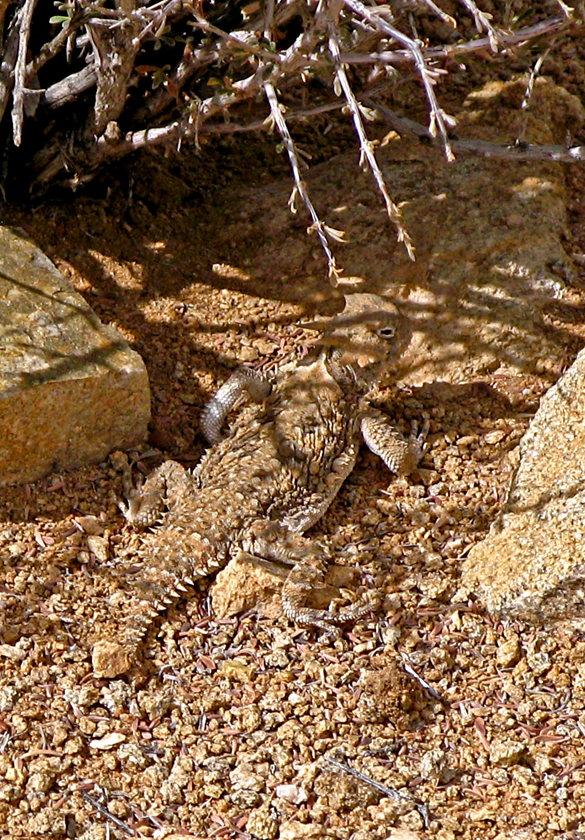
A young gopher snake had found the nest. All I could see was elegant coils of yellow and brown snakeskin draped over the eggs in the shallow scrape.
>> the gopher snake in the hen’s nest. It looks like it’s eating an egg, but it’s just the angle of the photo
After managing a few blurry cell phone photos in very low light, I moved away, not wanting to spook the snake. Since I didn’t know whether the quail hen was going to come back to the nest or not, it would be a shame if the eggs went to waste: the gopher might as well have them.
Would the snake eat all ten eggs? Would the hen abandon the nest in agitation? Did she even know she’d been robbed (possibly not if the snake came and went while she was away, because unlike ravens, quail can’t count). We didn’t know.
What happened was that the young gopher ate five of the eggs, and departed. The hen came back, and continued to incubate the remainder.
But only for two days. After that, she didn’t return to the nest and none of the remaining five eggs hatched. We don’t know if she abandoned the nest because of the snake, or because the eggs weren’t viable, or if she met her own fate (probably not to the egg-robbing adolescent snake, which wasn’t big enough to eat her). There were  five eggs for a while, then four, and now there are two — somebody’s coming back periodically for a snack.
<< today, two remaining eggs
It seems like a terrible loss for the hen, and it made us sad to not have a batch of fresh quailets swarming around the yard (and we still haven’t seen any quail hatchlings this season, which is unusual). But a moment’s reflection provides reassurance. The eggs went to a native predator, and weren’t wasted by some other pointless loss like being stepped on, eaten by a well-fed pet dog, or crushed by our neighbor with a dropped branch as he lopped mesquite limbs on our side of the wall. Even if the eggs had hatched, the odds are that some of the chicks would have been lost to predators anyway, perhaps to the very snake that scored the egg bonanza. I’m pleased to have gopher snakes and coachwhips (or even the occasional problematic other) working the yard, keeping less appealing scurrying neighbors in check. It means there’s some vestige of a natural system at play here, so I can’t truly begrudge them a baby cottontail or a quail egg, or eight.
With luck, experience, and efficient gene expression, the hen is sitting on another clutch right now under the watchful eye of her baby-daddy rooster, in a nest better hidden from foot traffic, human disruption, and snake-sense.
(All photos and illustration by A.Shock, except where noted)